|
(Click on any small
image to open full size image in another browser window/tab.) |
 |
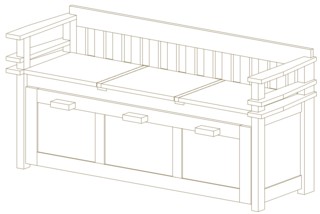
After the design of the bench was approved, the
walnut was acquired and all pieces of the bench were cut to rough dimension
and uniquely labeled. There are approximately 90 individual pieces of walnut
required for the complete bench. Over 20 pieces have already been taken from
the stack for additional milling and joinery work. |
 |
All of the pieces for the arm frames have been
precisely milled. Each arm frame is constructed using mortise/tenon joints
and rabbet joints. The arm frames have been dry fit only. Permanent
assembly will not be done until mating subassemblies are also at the dry fit
stage or permanently assembled. |
 |
The seat frame that bridges the arms together
and also provides for under seat storage has been precision milled. The
photo at lefts shows the subassembly going through the detailed joinery process. |
 |
The seat frame joinery work has been completed.
Proper fit between all the elements was verified with a dry assembly. Seen
in the photo at left is the complete seat frame glued and clamped. When dry,
the seat frame will be fitted to the arm frames using mortise and tenon
joinery. |
 |
Layout work is being done on the back
frame/rest. The vertical splats are laid out between the top and bottom
rails. Tenons have been cut into the ends of the bottom rail. The top rail
is yet to be cut to fit over the top arm plate of the end frames. |
 |
A close up view of the lower rail tenon. The
tenon will slip into a precise mortise yet to be cut into the back legs of
the arm frames. The top rail is yet to be notched to slip down over the top
arm plate of the arm frames. |
 |
Fitting the arm frames to the seat frame and
back frame begins. Tenons of the seat frame are visible on the right end of
the frame, as are the back frame tenons. Mortises (holes) need to be located
and milled into the arm frames to receive their mating tenons. Arm frames
will be positioned precisely relative to the seat frame so that the exact
placement of the mortises can be marked for an exact and proper fit. |
 |
The arm frame is not glued yet, only dry fit.
The triple layer arm rest pieces have not received final fitting, and the
back frame is only dry fit, not yet permanently assembled. Only the seat
frame is permanently assembled, at this point. Again, tenons on the seat and
back frames can be seen contacting the arm frame. The arm frames will be
precisely positioned, tenon contacts marked, and mortises cut precisely in
the arm frame legs to receive seat and back frame tenons. The back frame
will be set about 2" lower than currently placed, a notch cut in the outer,
bottom corner of the top rail of the back frame, and the rail will be
tenoned into the top of the leg of the arm frame. |
 |
All structural joinery is completed at this
stage. The bench is in a dry fit state. The only subassembly this is
permanently joined is the seat frame that bridges the arm frames. |
 |
A closer view of the styling of the arm frames.
|
 |
One arm frame with joinery completed. Arms
plates have been chamfered and fluting has been milled into the front and
back legs. The arm frame is dry fit only in this image. The partial taper of
the arm plates is apparent from this angle. |
 |
Lower view of the dry assembled arm frame
showing the fluting that has been milled into the legs pieces. Small base
pieces have been milled and mitered to fit into rabbets at the bottom of the
flutes. These base pieces give the legs the look of a complete column, much
like the appearance of columns on the clock case that will stand beside the
bench in the entry hall. |
 |
Arms frames, now permanently assembled minus the
top arm plates, are in clamps and drying. The back frame, also permanently
assembled, is resting atop the arm frames. The already assembled seat frame
is tipped onto it's front rail on the floor. The first coat of oil finish
has been applied to the back of the seat frame and along the front of the
bottom rail of the back frame. These are areas that will be rather hard to
access after final assembly. The first coat of oil has also been applied to
the inside of the seat frame. These are three storage bays that will be
under the three piece seat. |
 |
View of bench placed on it's back while hinge
mortises for the seat hinges are being cut. The mortising tools are resting
on the splats of the back, and one seat storage compartment is visible.
Mortising of the seat frame is in progress to enable the seat panel to be
attached to the frame. |
 |
View of the assembled bench with one seat
hinged, attached and raised. The center and right side seat panels have been
mortised to receive hinges and are merely resting in place. Mortises need to
be cut, yet, in the seat frame to receive the seat hinges. The bench in
permanently assembled now. |
 |
The assembled bench has received two coats of
oil finish. The lift up seat panels are resting loosely in place and will
not be attached by hinges until the finish process is complete on the bench
frame and seat panels. Laying on the work surface under the bench are the
two end panels that will be permanently fitted to the bench once they have
been given two coats of oil finish, front and back. |
 |
A close up view of one of the bench end panels.
The raised panel inserts are solid walnut, not a veneered, vacu-formed ply
panel. The panel frames (cope and stick) and raised panels were fabricated
in-house from hand selected walnut stock to ensure a high degree of grain
match with the rest of the bench. |
 |
A close up view of one of the bench legs with
fluting milled into the front and outside surfaces of the leg below the
lower arm plate. Bases have been let into the surfaces of the leg at the
bottom of the flutes. One of the bench end panels is visible under the
bench. The panel assembly is only in dry fit stage with oil applied to the
raised panel, but not to the panel frame pieces, yet. |
 |
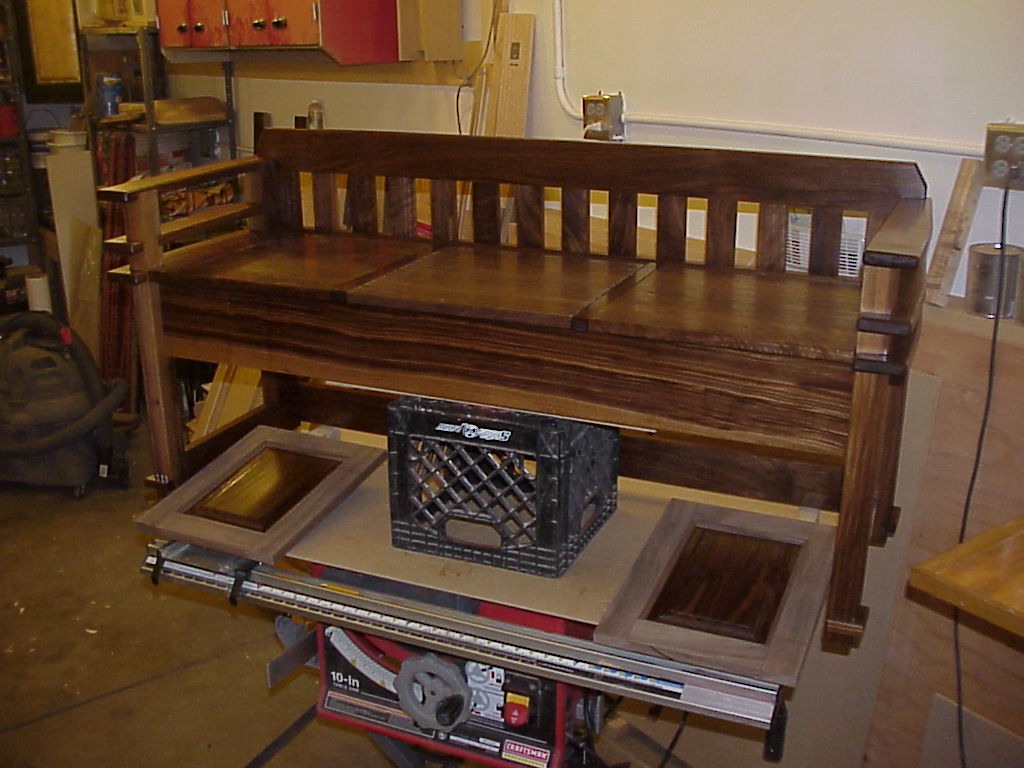
The elements of the under seat drawer have been
final cut, jointed and dry fit together. The drawer will run the full width
of the bench and will provide storage for items such as shoes, etc. The
deacons bench is visible in the background, albeit a bit dusty. |
 |
The triple raised panel drawer front has also
been jointed, shaped and dry fit. The triple panel is assembled very much
like wainscoting panels for a wall. The raised panels inside the frame are
of solid walnut. |
 |
The drawer and triple panel assembly have been
dry fit and clamped together. When the drawer is closed, the panels will
align with the end panels of the bench and give a wrap around, raised panel
treatment to the bench and will fully conceal the drawer bay and contents. |
 |
This is a close up view of the lower right
corner of the panel/drawer assembly. The shape of the raised panels and
frame profiling is very visible, as are the dove tail joinery of the drawer
box. |
 |
The drawer assembly has been completely, and
permanently assembled. The raised panels have 3 treatments of oil finish
applied, while the panel frames and drawer box have received the first
treatment of oil finish. |
 |
The raised end panels have been permanently
affixed to the bench frame and the entire bench has received 3 treatments of
oil finish. The bench will be buffed before receiving at least one more
treatment of oil finish. The seat panels have been buffed and have been
given another treatment of oil finish. |
 |
This is an end view of one of the raised panels
on the bench. |
 |
The complete deacons bench. All seat panels and
the drawer are closed. |
 |
The complete deacons bench. The center seat
panel is raised to reveal the storage compartment underneath. Each seat
panel raised for storage access. The full width drawer is also open. |
 |
A close view of one side of the bench. The
walnut is richly grained with beautiful contrasts within the graining. No
stain has been applied to the wood. |
| |
|
|