| |
Library Wall - Hickory - Tung Oil based finish
MountainHaven
created a media storage and
library wall for a private office space.
The initial 3D conceptual model of the library
wall is shown below. Some of the functional requirements included having a
standing height work surface, considerable drawer storage below the work
surface, and library and artwork display space above the work surface. The
client selected hickory (often referred to as pecan, as well) as the wood
species of choice. The library and artwork display space utilized a mix of
glass and solid hickory shelves.
|
|
|
 |
|
The wall system
was designed to be built and installed in
two stages. The base units and working surface were constructed and installed
first so that the client would have the use of the storage space and work surface
while the upper library and display units were being built.
The full
collection of base and upper units have been installed in the office of the
client. as shown below. Click
on the small images to open a full size image in another viewing window.
The
lifecycle chronology of the project is illustrated and described below. Click on any of the
small images to open a full size
view in a separate viewing window.
|
|
|
 |
|
The
base assembly is comprised of three physical carcasses that will hold four
drawers each. This image shows the three carcasses and the completed drawer
boxes. The drawer boxes are solid hickory and utilize full dovetail joinery
for strength, durability and aesthetics. The drawer bottoms are a hickory
veneered plywood. |
|
|
|
|
|
|
|
 |
|
This
is another view of the three carcasses. Four drawers have been stowed inside
each carcass as a matter of shop space utilization and reduced risk of
damage. A solid hickory face frame is attached to the front of each carcass.
At this point, all the drawer boxes, face frames and solid hickory end panel
have been prepared for the application of the first coat of finish. |
|
|
|
|
|
|
|
 |
|
This
image shows the collection of carcasses and drawer boxes. Laid out on the
shop floor are the solid hickory drawer fronts. The top row of three drawer
fronts is on the left, the bottom row is on the right. Each row of drawer
fronts is milled from a single piece of hickory. This will create a grain
pattern for each row that will be homogeneous across the full row of
drawers. |
|
|
|
|
|
|
|
 |
|
An
initial finish test was prepared and the client was invited into the studio
shop to review the tonality and grain clarity of some finishes. The
result was close, but not quite there. Consequently more "recipe"
development is being done to perfect the blend and application process to
yield a subtle shift in tonality of the highlights in the hickory while
maintaining superb grain clarity across the full spectrum of the natural
tones of the hickory. The "recipe" boards are shown at left. |
|
|
|
|
|
|
|
 |
|
The full length work surface has been grain
matched and joined together from three planks of hickory. The grain pattern
runs uninterrupted from one end to the other. Solid hickory has been used
for the work surface rather than veneered ply to ensure rugged durability
and ease of repair, should such ever be needed. The work surface will be
mated to the base units in a manner that will allow wood movement with
changes of climate, though for the cross grain dimension of this work
surface such expansion/contraction should never exceed 3/16" maximum. |
|
|
|
|
|
|
|
 |
|
The base units are undergoing the fitting of all
the drawers. In this image, the nearest base unit has had all the drawers
and slides fitted, then taken apart to prepare to receive the wood finish.
The center base unit has all the drawers and drawer fronts in place. The far
base unit is on the workbench (not visible) having the drawer slides fitted. |
|
|
|
|
|
|
|
 |
|
Two base units are visible in the foreground.
One base unit has drawer fronts and pulls installed. The other base unit has
been completed fitted, but is now taken apart and is ready to receive the
first application of wood finish. The solid hickory countertop is visible
resting on top of the base units. In the background is the third base unit
sitting atop the workstand. The fitting of drawers has just been completed
on the third unit. |
|
|
|
|
|
|
|
 |
|
The base units and drawer fascia (drawer fronts)
have all received the last coat of finish. Visible in this image is the end
panel of the base unit that will be set next to the entry door to the
office. Resting on top of the base units are the drawer fascia pieces. The
last coat of finish has just been applied and is still wet. The sheen will
be more subdued when dry. |
|
|
|
|
|
|
|
 |
|
All of the fascia pieces for the drawers have
been laid out on top of the base units. The last coat of finish has just
been applied and is still wet. Once all the pieces are dry they will be
attached to the drawer boxes. The drawers will then be remounted in the
drawer units and the drawer pulls will be put back on. |
|
|
|
|
|
|
|
 |
|
With the final coat of finish applied to the
base unit face frames and all the drawer components, the drawers have been
remounted and the fascia pieces attached to the drawer boxes. Drawer pull
hardware has also been installed. This is the base unit that will be
positioned next to the office door. The end panel is solid hickory rather
than hickory veneered plywood. The end panel has been mounted to allow for
expansion and contraction over time, yet is solidly connected to the drawer
unit box frame. This will be much more durable than a veneered ply. |
|
|
|
|
|
|
|
 |
|
A view of the base units, drawers installed with
drawer pulls in place, too. Grain patterns are continuous from left to right
across each row of drawers. All three base units rest atop a single
foundation to which hickory toe kick plates will be added. The foundation is
not quite visible in this image. |
|
|
|
|
|
|
|
 |
|
Staying on top of the work in the studio shop.
The counter top for the drawer units is solid hickory. This image shows the
beginning of the sanding and finish prep process on the counter top. Both top and bottom
surfaces will be rough sanded. Once rough sanded, the bottom surface will be
given 2 coats of sealer and finish. The top surface will be sealed and
receive at least 4 coats of finish, one of which will be tinted to reduce
the degree of yellow in the white woods. No stain is being used anywhere in
the project. The toner is custom mixed using dye in order to avoid loosing
clarity in the darker tones of the grain. |
|
|
|
|
|
|
|
 |
|
The counter top has been prepared for the finish
process. Note in this image that the edging has been applied and has also
been profiled to match the profile pattern on the perimeter of the fronts of
the drawers. |
|
|
|
|
|
|
|
 |
|
The counter top has been cleaned and is ready
for the seal coat of the finish. |
|
|
|
|
|
|
|
 |
|
The tung oil based seal coat of the finish is
being applied to the counter top. Even at this step, the wood grain really
comes alive. |
|
|
|
|
|
|
|
 |
|
The counter top has been given 2 coats of the
tung oil based sealer. Although several more steps remain in the finishing
process for the counter top, this image and the next one down really convey
how the base units and counter top will look as a whole. The counter top has
not yet received the toner coat to control the degree of yellow tint in the
lighter areas of the wood. An overall tone disparity may be noticeable in
this image and the next one down because the base units have received the
toner coat that is yet to be applied to the counter top. |
|
|
|
|
|
|
|
 |
|
This view of the temporarily assembled base
system provides a good idea of the overall look of the cabinetry. The
counter top has not yet received the toner coat to control the degree of
yellow tint in the lighter areas of the wood. An overall tone disparity may
be noticeable in this image, and the one above it, because the base units
have received the toner coat that is yet to be applied to the counter top.
The most prominent wood grain patterns key around the union of the three
planes (top, front, end) of the base system. |
|
|
|
|
|
|
|
 |
|
All of the base units have been assembled. The
foundation has been anchored directly to the floor after the carpet was cut
back. The base units were then placed and aligned, anchored to the
foundation and wall studs, then the one piece, solid hickory top was set in
place and anchored. Ready for use. The next phase will create the
bookcases that will go above the base units. |
|
|
|
|
|
|
|
 |
|
The upper bookcases will consist of two tower
units with internal shelves. The tower units will be places at the ends of
the base units, forming a space for a third virtual tower between them. The
second of the two towers has been assembled and is yet in clamps in this
image. The tower on the right side of the image is almost ready for the
application of the finish. |
|
|
|
|
|
|
|
 |
|
The upper bookcases are shown with wood shelves
inserted into the assembly (excluding top glass shelves). The cases are
almost ready to have finish applied. All the shelves need to be sanded yet
and have the front edges profiled. |
|
|
|
|
|
|
|
 |
|
This is a view of one bay out of the three
bookshelf bays. The recessed mini-flood light is visible. Each bay will have
a recessed light in the top of the unit. |
|
|
|
|
|
|
|
 |
|
The shelves have received the first coat of
finish. They are of solid hickory and have been designed and built to resist
sagging that can be induced by a heavy load of hard cover books. |
|
|
|
|
|
|
|
 |
|
A view of two tower units for the bookshelves.
The unit near the camera has received the first coat of finish. |
|
|
|
|
|
|
|
 |
|
All of the trim pieces have been milled and
profiled, including the crown mouldings. Each piece is rough cut a bit long
and will be trimmed to precise length at the time of installation. The first
coat of oil finish has been applied to all the trim pieces. |
|
|
|
|
|
|
|
 |
|
An open cabinet unit has been fabricated to go
above the office door. The unit has been designed and fabricated to include
two downlights to facilitate using the cabinet as a lighted display bay. |
|
|
|
|
|
|
|
 |
|
A view of all the pieces for the upper section
of the office wall. Two bookcase towers are visible in the rear of the
photo. The above door cabinet is visible resting on the stack of solid
hickory shelves. The tower bridge is in the stack of shelves. The bridge
will be used to create a center bay of bookshelves between the two towers.
All the crown and corner trim pieces are laid out in the foreground. The
only items not included in the photo are the glass shelves and the recessed
lighting units that will be installed as a final step before delivery. |
|
|
|
|
|
|
|
 |
|
The upper section of the office wall includes
lighting fixtures. This photograph shows the base units being modified with
the addition of a switched wiring harness to supply the accent lighting
built into the upper units. |
|
|
|
|
|
|
|
 |
|
All but one of the upper units have now been
installed and connected to the wiring harness. Trim is yet to be installed. |
|
|
|
|
|
|
|
 |
|
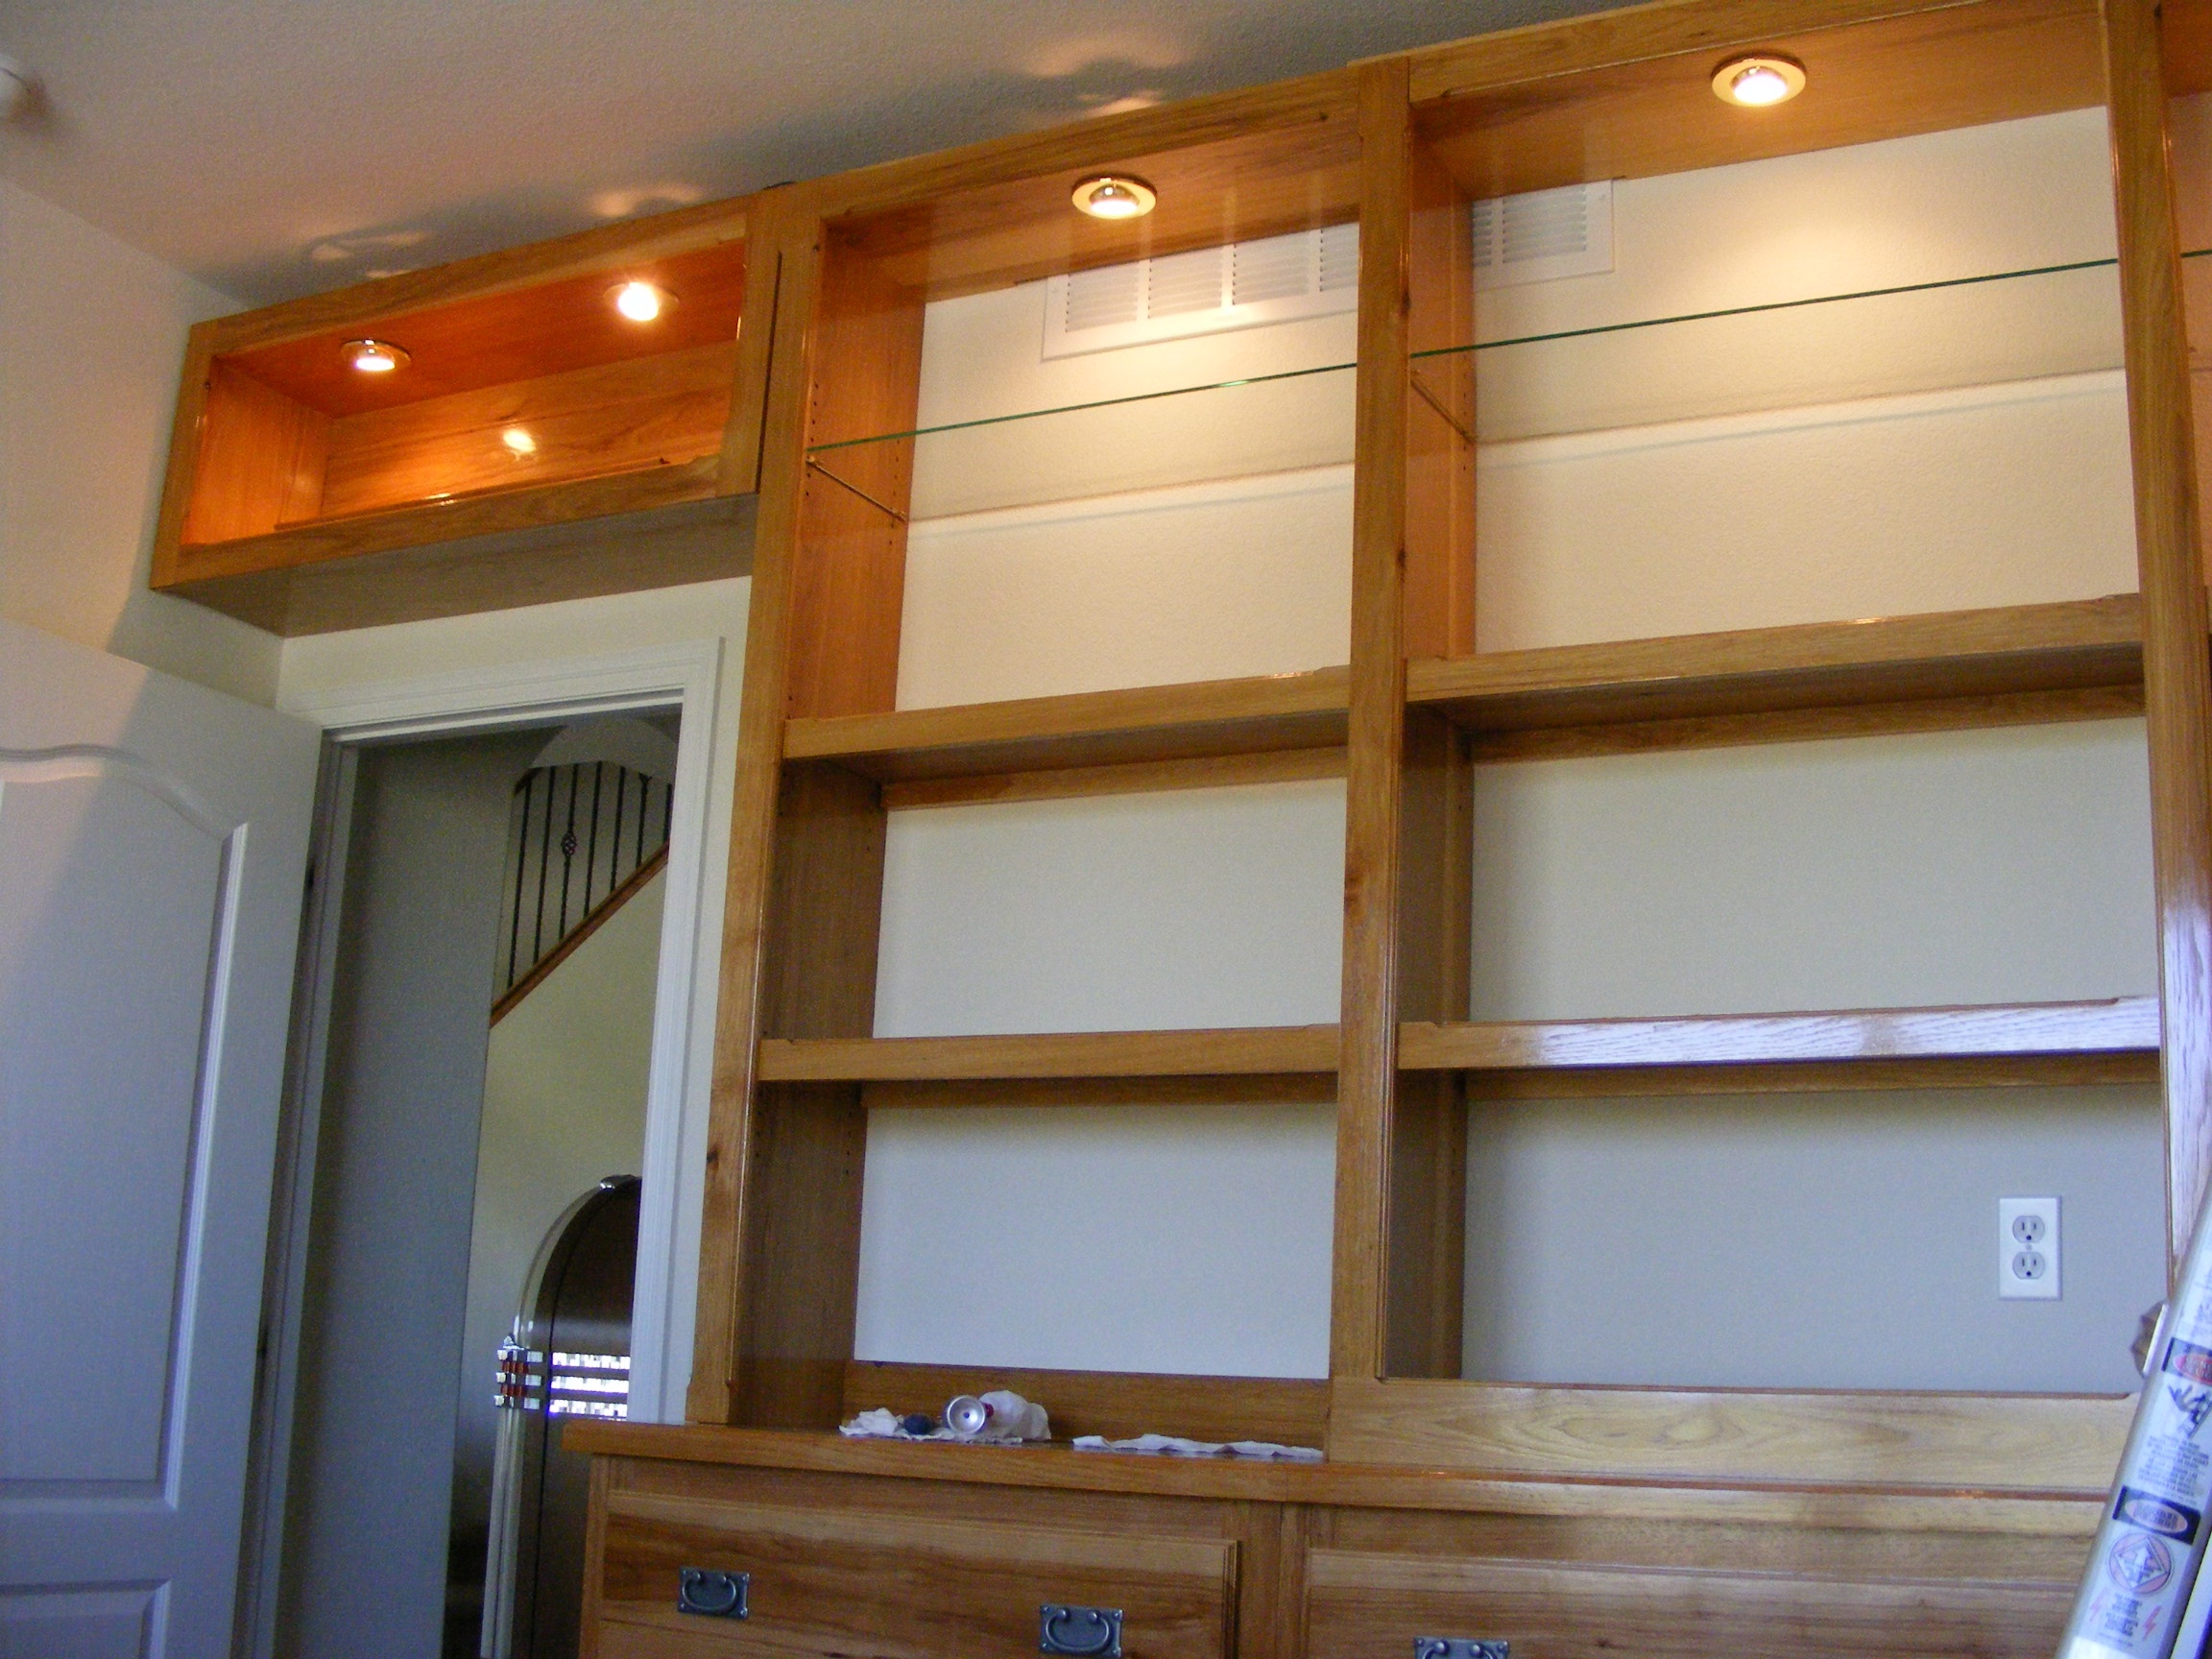
All upper units are now in place and the
lighting has been tested. The display unit above the office door contains
two small flood lights. Each bay of the shelf towers contains one small
flood light. |
|
|
|
|
|
|
|
 |
|
All of the upper units are installed and the
trim is complete with the exception of the center section of crown molding.
Shortly after this photograph was taken the last piece of crown molding was
installed and the installation was complete. |
|
|
|
|
|
|
|
|
|
|
|
|
|
|
|